
How to Start a Blog – A Simple and Hassle Free Guide to Getting Started

What is a Blog?
How to start a blog. Essentially a blog is a website, nothing more than a simple to setup website with some very powerful features to make web-mastery very easy and usable. Before the introduction of WordPress (my personal fave platform) content creation by the regular person had to be created on websites and message boards.
Thankfully this is now not the case and I’m sure there isn’t one person in the world that can’t create their own blog and benefit from doing something they truly enjoy.
So You Want Your Own Blog?
Did you know you can start your own blog for as little as $3.00 per month with a domain name included?
Go Ahead, check for a domain name now:
Starting your own blog can be truly great and open so many doors to new opportunities such as:
- A new job or better yet a new passion which can earn you an income with amazing returns!
- Splitting from that dreaded 9-5 or a break from climbing the corporate ladder
- A part time passion or hobby to impress your friends or run the site at your local club
- A side income to increase savings or a vacation or even a monthly car payment
- Or Simply just something to keep you occupied to learn new skills
In this tutorial you will find both video and a full text and image walk through. If you would rather watch the quick start video, simply start the video below and watch as I walk you through from start to first blog post. You can use the walk through as notes as you go.
How to Start a Blog:
Whatever your reason for blogging, starting a blog can be great!
Personally, I’ve been blogging since 2010 and had numerous blogs in fitness and more so the internet marketing niche.
When I started, my main focus was to live a free lifestyle by using the internet as my tool for creating an income. I’ve made mistakes along the way which is true for any business but I’m still here and I love it.
Right now I own, partner, and have been involved with several internet marketing businesses. I own and develop blogs and online products for myself and partners, I’ve built various coaching programs from monthly coaching tips and product development programs, to coordinating modules for huge training courses worth 1000’s of Dollars. I’ve also created over 100 online business products…
You could say I’ve learned some great lessons along the way.
But most of all I’m no different to you reading this now….
I’m not special, not a tech wiz, or a super brain. I’m just a normal guy who didn’t want to work 70 hour weeks… so I started with a simple blog.
So Are You Ready?
“If I can do this, so you can you”.
In fact, over 2,020 people to date have invested their time in my programs and started their own blogs.
But this isn’t about sales of my products and how much I earn, it’s about getting you started with your own blog for FREE right now and to start a journey earning your own income from something you love!
So are you ready?
Step 1 – Getting started
Choosing Your Niche
When it comes to choosing your niche there are a few factors to consider. I regard passion as a great focus points to choosing a niche, although sometimes this is not always the case.
When you first make the decision to start a blog, it can be done for many reasons.
Some of those reasons are:
- Money
- Personal Charity or Community
- Informative and help guides
- Fun/hobbies
- Work/business
Whatever niche you decide to blog about, stick with your niche and don’t mix up your niche content e.g. mountain biking and knitting don’t exactly mix.
By choosing a specific content topic or niche you allow for all your readers to be interested in the same topic, this creates certain ingredients for a successful blog:
Community – As well as reader interaction, you create community, people interact with each other. With the introduction of social media, this can lead to Facebook fan page members, groups and Twitter followers.
Expert status – Blogging about a niche specific subject allows you to become, and be seen as, an expert within your niche. Blogging about various subjects makes you seem like a jack of all trades and master of none.
SEO specific – When it comes to the search engines, having specific content topics allows you to target your whole blog to make it easier for the search engines to track your blog and target a niche.
Monetizing and ads – When you want to make money from your blog, you need advertising and products. If your blog isn’t targeted towards a specific niche, you are going to have a problem with ads and product advertising.
“So have you got a niche in mind?”
Let’s Get a domain and hosting…
Step 2 – Choose Hosting
No matter what type of blog you wish to run, hosting is essential, you simply can’t do without it.
You may argue the point that you can use a free shared hosting account or an account from WordPress.com. These are free options which can be an alternative, but they shouldn’t be used in the case of a personal blog or biz blog, here’s why…
In short free hosting is terrible and you need to be in control of your domain and webspace. With free hosting you have no control and most of all no brand.
You decide which domain looks more professional domain 1 or domain 2:
Domain 1 – www.WordPress.yourchosenblogname.com
Domain 2 – www.yourchosenblogname.com
“If you chose number 2 you are correct”
The bottom line is, don’t try to save investment money on the key items for your business. Hosting is a must, whatever online business you are in, so don’t go free hosting you’ll regret it.
If you are wondering what the costs are, they are tiny at approximately $3.95 per month including your domain name, so don’t sweat the costs.
Remember – $3.95 per month allows you to run an entire blog with a free theme.
OK, now it’s time to check for a domain name:
Once you have found a domain name for your blog using the checker above, you will be taken to Blue Host to choose your hosting package. I recommend the cheapest package they have to get you started.
You don’t need a huge managed server, a simple hosting package and a domain is all you need.
Grab the basic $3.95 package below:

*please note prices can fluctuate a little.
We are going to use a combination of WordPress (the most versatile platform) and BlueHost as your hosting partner. Bluehost has an automated WordPress setup feature, so you don’t have to worry about the techy side of anything.
This is a great a stable partnership that costs very little and will run your whole business no problem… so remember to grab only the basic package…
Once you have grabbed the basic package, you will be asked to choose your domain. (If you used the checker above, this part will be skipped).

What is a Domain Name?
A domain name is the name of your website if you didn’t already know. My domain name is “dansumner.com” as you can see in the URL of your web browser.
If you don’t have the domain name idea just yet, stay cool! You can click the link to create it later and continue with registration while you think.
Account Creation
On the next page you can create your account:

These form items are pretty straight forward, until you reach the length of your plan. The 36 month plan is the cheapest option and provides the best value for your money.
However, if the 36 month is too much commitment, the12 month option is still great value:

*please note prices can fluctuate over time but not a great deal.
Remember, you can cancel risk free for 30 days. Bluehost offers this as a guarantee, and you can cancel your plan at any time during the first 30 days and get a full refund.
Once you have chosen your plan, it’s time to ignore the extras.
Yes that’s what I said, ignore the extras apart from domain privacy, so leave this checked:

Domain privacy, stops the spammers and companies calling you about your domain and asking for money. Keep your domain private.
Finally, all you have to do is add in your payment details, check the Privacy Policy and Terms of Service check boxes, and submit your details and BlueHost will take care of the rest:

The next step is to create a strong password, and login to your hosting account. All your details will also be sent to you via email, so you can login without any problems:

Guess what?
Congratulations You Have Your Own Business Domain and Hosting!
Well done! Give yourself a high 5 and refill your tea or coffee cup…
Now let’s get setup and get ready to view your website online. This part is very simply indeed…just a few more steps to go.
Once you have your login details (sent to you via email also) you now get to choose your website setup and what kind of website you are creating:

Simply go through the process and Bluehost will guide you through the setup to guide you on what type of blog you going to create. If your business niche is not on the list, don’t worry simply choose the personal option.
It’s Time to Choose a Blog
The next steps are a pretty simple point a click process.
Bluehost will ask you what you want to setup in terms of your website. Check the blog image as shown below:

Add your Blog Name and Tag Line
The next steps are to choose your blog name and tag line to setup. Now if you bought a domain, you will know roughly what your blog is going to be called.
Don’t worry if you can’t think of a title and tag line just yet, these can be added when you create your blog and design your theme:

The next window you will see is a choose your theme window. DO NOT choose a theme yet, simply skip over this section to be taken directly to the members area and blog install window which should appear as soon as your login to your control panel:

Members area Login
It’s time to celebrate a little as your blog should now be installing while you wait and it will almost be ready for you to login to the control panel and see your new blog online. When you login to the members area you have 2 options:
1. View My Site Button (allows you to look at your new blog)
2. WordPress Button (logs you into the WordPress dashboard
You can see from the dashboard image below, that your website is ready. Simply ignore the check boxes under the recommended tab and go right for the WordPress admin panel by clicking the Blue WordPress button

Congratulations, you have a WordPress blog online. This is the start of an exciting new business!
Step 3 – Choose Your Theme
OK, let’s get your new creation looking pretty with the addition of a new theme. From the image above, you need to hit the blue WordPress Button which will log you into your admin panel. You should see something similar to the image below once done:

The section we are most interested in is the – Appearance – Themes section on the left hand side:

Once you find this section, simply click the Themes link and you will be taken to the theme section of your blog dashboard. Once inside the themes section, we are going to look for Flash Blog Theme by using the search bar on the right:

Once you have searched for the Flash Blog Theme, you should see the blog theme appear on the left hand side directly below the search bar. Once you see it, simply install it and activate it:

Once you hit the activate button, you can then head to the top left hand side of your blog control panel where you see the small house icon (home) and your domain name, right click and open in a new tab or window:

You will see your new theme installed, ready to be edited similar to this:
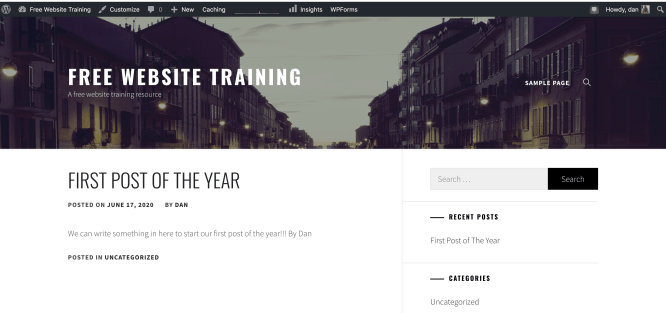
The Next Step is to Edit The Theme as Your Own
Bask in your creation for a few seconds…
Now it’s time to customize. To do this simply click the customize button on the top bar of your website where you will be taken to the customizing panel of your website:

Once you hit the customize button you will be taken to customize admin panel where you can spend some time getting to know your blog and exercise those creative juices to make your blog your own.
On the left hand side, you can see the custom admin panel. Each section opens-up a new feature to adjust your blog to the way you want it.
Go ahead and give it a try:

Step 4 – Create Your First Post
Now you have had a chance to play with the theme and hopefully gotten used to the features, it’s time to create your first post.
“Please remember, you can continue to customise long after you post to your blog. The more time you spend in the admin panel the more you get used to it”
So how do you create your first post?
Let’s take a look at the posting section and how you can get started creating your first post.
If you head back to the main admin panel, we need to make a stop at the plugin section to make your blog life a little easier and install a plugin called Elementor Page Builder.
So let’s go to the dashboard and checkout the plugin section:

Once you click the add new plugin, you will be taken to the plugin sub menu where you can add the Elementor Page Builder plugin.
The same rules apply as adding a theme. Simply type in the search bar Elementor Page Builder and it should appear as the first plugin on the left directly below the search bar:

Once you see the plugin on the left, simply install it and activate it. Once activated you will see the Elementor Page Builder displayed on the left menu:

You shouldn’t have to do anything with the page builder, this simply makes life easier when adding to your blog posts and pages.
OK, let’s get your first post online!
If you head to the post section of the dashboard and click posts, you will be taken to the post sub menu. Once inside highlight the ‘Hello World’ post and trash it. This is the default post by WordPress which isn’t needed.
To start your first post click the ‘Add New’ button. You will be taken to a new window just like this one. All you have to do is add your title as shown in the second image:


Don’t start your post just yet. The next step is to click the ‘Edit with Elementor’ button.
Once you edit with Elementor, you will be taken to the element panel menu where you can edit your post. Very similar to the customizing options of the blog, you can simply drag and drop, text, image and video from the left hand element menu. Go ahead give it a try:

Once you are happy with your first post creation, it’s time to publish your post and make it live online. You can find the publish button on the bottom left of the Elementor control panel. Simply click Publish and your post will be set live online. You can view it, by clicking the Have a Look button:

You can view your post as soon as you hit the publish button.
‘The Have a Look‘ link will apear so you can check out your newest creation:

Step 4 – Getting Used to WordPress
The nest steps are getting used to the WordPress dashboard and working with your new site adding content and building your business.
At this point, all new bloggers feel a little overwhelmed but trust me, it’s not too hard and after a little practice you will start to get the hang of it all.
Working on Your Content
As well as getting used to your new blog and dashboard you should be working on new content and new posts. Your blog needs YOU!
Content is the lifeblood of your blog, and rightly so. It’s the content you write, shoot on video or record that people want to view. Fresh new content keeps the readers coming back and the search engines happy. It’s this content that makes up your blog and it’s this content you have to create.
If you are blogging for the first time then you should have a bunch of posts ready to go.
“If I was to start from the beginning I would create at least 10 posts to post to my blog. I would then upload all the posts to my blog in draft format. This allows a buffer for me to fall back on”
As well as having 10 posts pre-written I recommend having an ideas list of future content to create.
Here are some post ideas you can have prewritten to save you some time:
- Write a tutorial series – Tutorial series of posts are brilliant. They teach people how to get around problems and complete things they could not do otherwise. The main feature of a tutorial post is you can spread them out over a few posts. This could set you up for 2 to 3 weeks depending on your posting frequency.
- Write a list post – List posts are easy as well as engaging. How many headlines do you see every day that have a list in it? Take a look next time you are reading a magazine or newspaper. They are everywhere and work very well.
- Write something personal – This is another easy post. What is your most knowledgeable subject? You, right?
Of course it is. Write about yourself or something you have done or achieved. This type of post lets people see the real you, the person behind the blog. It allows people to build a mental image of who you are, and build a relationship. This works well. When completing a backup post, ensure your posts are evergreen. - The List Post – A good old favourite of mine which is great Google food for high search engine rankings. E.g. 5 Product Launch Tips.
- The Review Post – Product review posts are always great ways to rank your blog next to the websites you are reviewing. I have some review posts on my Bonus Blog.
- Book Reviews – I have reviewed one or two products on my Bonus Blog which have turned out quite successful. You can also affiliate link to the product you are reviewing and earn commissions.
- The Huge List – A lot like the list post, but a lot larger e.g. 101 things to do with SEO.
- The How-To Post –How to add widgets to your blog, or how to make your blog an authority blog.
- Themed Post – Post about a particular time of the year or an event
- News Post – You could write a post on a local topic and mention a service you’re
offering. - The Advice Post – Ask the reader what topics you’d like to discuss in the next post. This is a great idea and a cool way to involve your audience.
- Round-up Post – Which blogs do you actually read and which bloggers do you respect? A great way to share other blogs online and also a great way to grab the attention of other bloggers from ping backs and track backs.
- Ethical People to Follow – Which people are you most intrigued by and follow? You could talk about inspiring people, heroes and people you follow.
- Mentors and Coaches – Case studies and a review of your training experiences on any courses you have taken part in.
- The Biggest Mistakes – This one speak for itself. People love to hear about the mistakes you have made, especially in business. These posts project a real person with real achievements.
- Problem Solving – Post on something that happened to you and/or your blog and what you did to solve or fix the problem.
These are just a few ideas you can use to help you post great valuable content.
The Next Steps
The single most important thing you can do right now is get started! Don’t fear the unknown, just jump right in and get started.
Remember to focus on learning how your blog works and especially writing content as this is the real reason people will seek you out.
“Have you considered my Bloggers Roadmap report?
For a limited time only I’m offering 50% discount on my flagship blogging training “The Bloggers Roadmap” If you feel you would like to take things further, you can view that HERE”
I’ve also singled out a few posts you may want to read which will help with your blogging journey:
50 Email marketing Headlines to Make You a Legend
Beginners Email Marketing Course
14 Ways to Maintain Focus on Your Magical Projects
Final Words
I hope you have enjoyed how to start a blog. If you would like to comment please go ahead I’m here to help you. I can also see this post growing into somewhat of a huge tutorial, so bookmark so you can grow your blog with this post.
Don’t forget to jump on the Blogging Boot Camp below. I have tailored a 5 day course to help you get the most from your blog.
Thanks for reading today!


Are You Ready For Your Very Own Blogging Bootcamp? Grab Your FREE 5 Day Blogging Course Delivered to Your Inbox
To get onboard simply enter your email address below and we can get started immediately.

